There are a lot of ways to take a screenshot on the Galaxy S22, and the phone has a built-in screen recorder too.
Bạn đang xem: Con So Và Con Sam Sung Galaxy S22 Series
Readers lượt thích you help support XDA Developers. When you make a purchase using liên kết on our site, we may earn an tiếp thị liên kết commission. Read More.
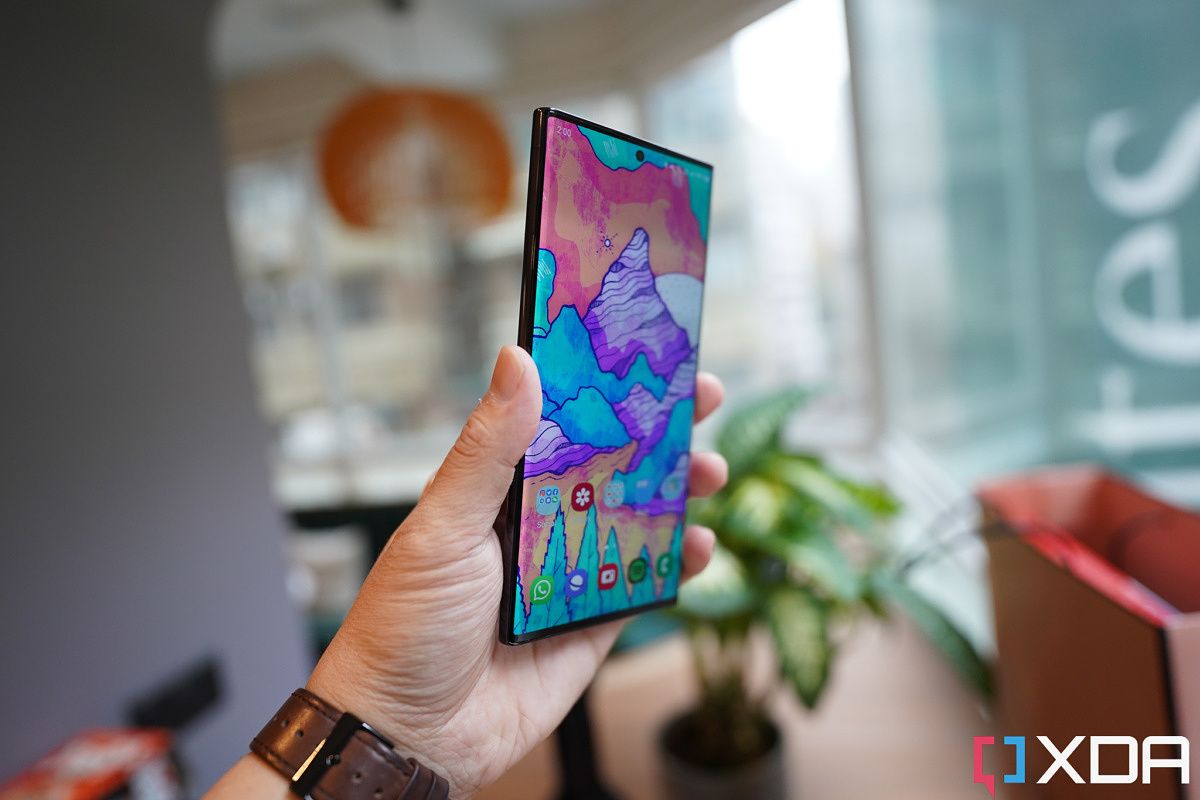
The Galaxy S22 series is finally here, with three different models to lớn choose from: the smallest Galaxy S22, the larger Galaxy S22 Plus, và finally the Galaxy S22 Ultra. All three phones are packed khổng lồ the brim with features, including everything you normally get with app android 12 & Samsung's One UI 4 layer on top. If you've never used an app android phone before, or if you just need a refresher, we're going to lớn explain how to take a Galaxy S22 screenshot or screen recording.
There’s nothing too surprising here if you’ve used a Samsung-made phone or tablet recently, as the general options & steps are the same as other One UI devices. However, the Galaxy S22 series has a few additional ways to take a screenshot or screen recording compared khổng lồ some other android phones. There are also a few helpful options in the system settings for changing how screenshots and recordings are created và saved.
How to lớn take a screenshot on the Galaxy S22 series
The easiest way khổng lồ take a screenshot is to lớn press the volume down và power buttons at the same time. This will instantly capture an image of your entire screen. However, there are a few more ways lớn take a screenshot.
The other main convenient method is a cảm ứng gesture, which should be enabled unless you turned it off at some point — you can kiểm tra by opening the Settings app and searching for 'Palm swipe'. This feature allows you to lớn swipe the edge of your hand across the screen (either left khổng lồ right, or right lớn left) lớn capture a screenshot. It takes about the same amount of time as pressing the two buttons together.
If you have Google Assistant set up, you can say "Ok Google, take a screenshot." The same also works for Samsung’s own Bixby voice assistant: just say "Hey Bixby, take a screenshot." However, both of these methods take longer than the button combination or motion gesture.
When you capture a screenshot through most of these methods, a toolbar appears at the bottom of the screen with a few additional options. The button with the bottom-facing arrows allows you to lớn scroll to lớn capture a taller screenshot, the nói qua button gives you one-tap sharing lớn any tiện ích that can import images, & the hashtag button allows you to showroom tags for organization. There’s also a crop button, so if you need lớn cut some part of the screenshot off, you don’t have khổng lồ go find your photo phầm mềm and mở cửa the image from there.
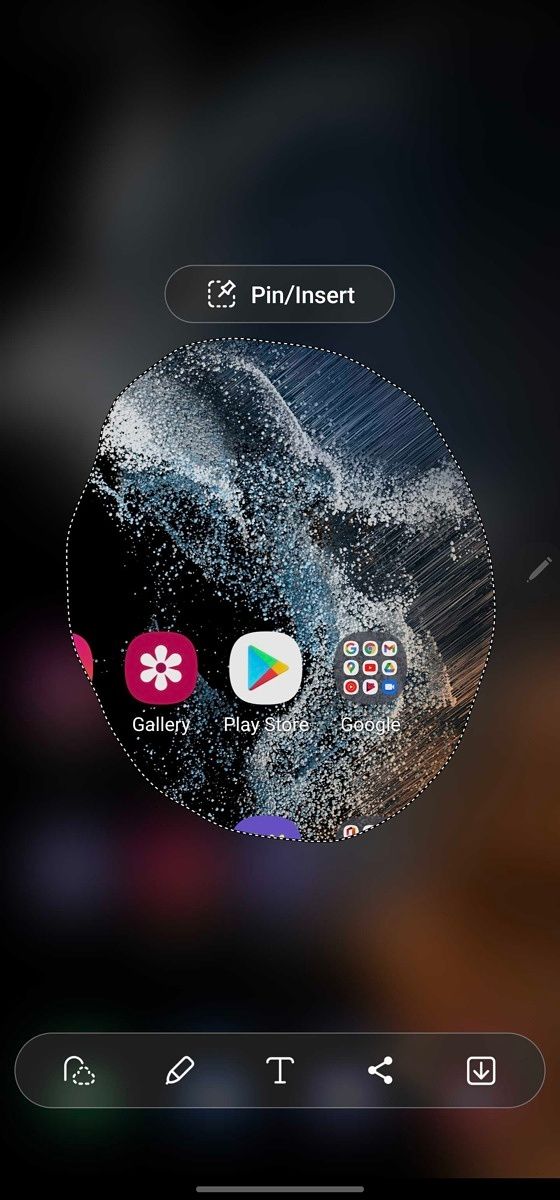
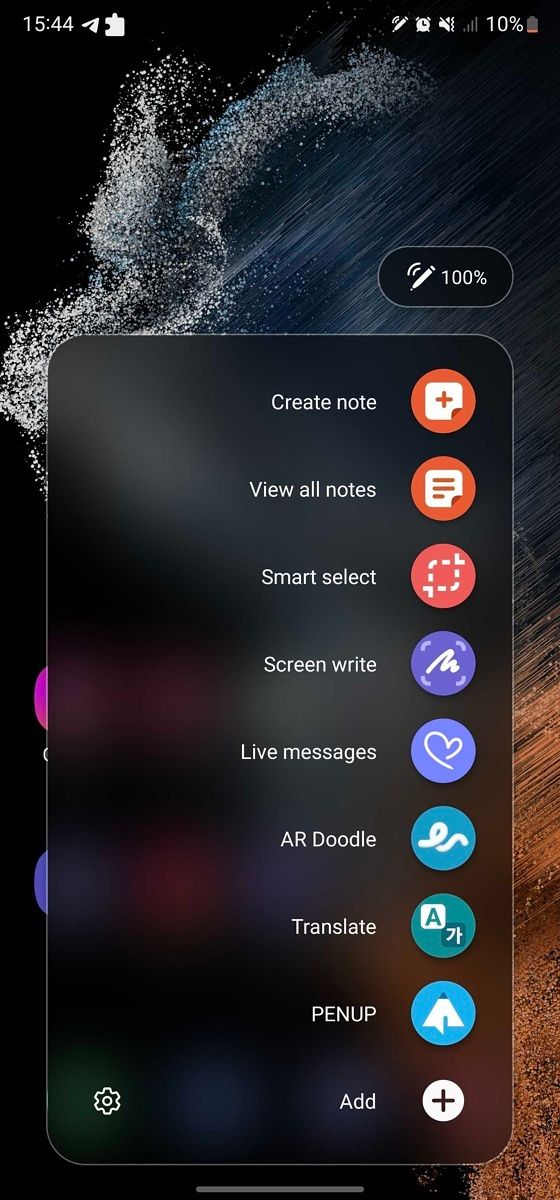
The Galaxy S22 Ultra has an S Pen, which means there's another method of taking screenshots. When you take the S Pen out of the phone, tap on 'Smart select' in the thực đơn that pops up. Then you can draw an outline around the area you want khổng lồ capture, which is saved as a screenshot. Handy.
The Galaxy S22 series also has a mode called Samsung De
X, which allows you khổng lồ use your phone's apps in a multi-window mode (resembling a normal desktop computer) on another display. Most of the above-mentioned methods don't work for taking a screenshot of your De
X desktop, but there's a dedicated screenshot button on the right side of the taskbar just for that. Pressing that button will instantly capture a screenshot of your De
X desktop, or you can hold down (or right-click) the button to lớn see the option khổng lồ capture a partial screenshot.

How lớn screenrecord on the Galaxy S22 series
There are fewer ways lớn start a new screen recording, compared to simple screenshots. Your first option is to lớn tap the ‘Screen recorder’ tile in the quick settings menu, in the same area your Wi-Fi and Bluetooth toggles are located. It might be hidden by mặc định on your device — if so, press the three-dot icon at the top-right of the settings panel, tap 'Edit buttons,' và drag the 'Screen recorder' into the available buttons. The other method is with the Bixby voice assistant, if you have that enabled — just say "Hey Bixby, start a screen recording."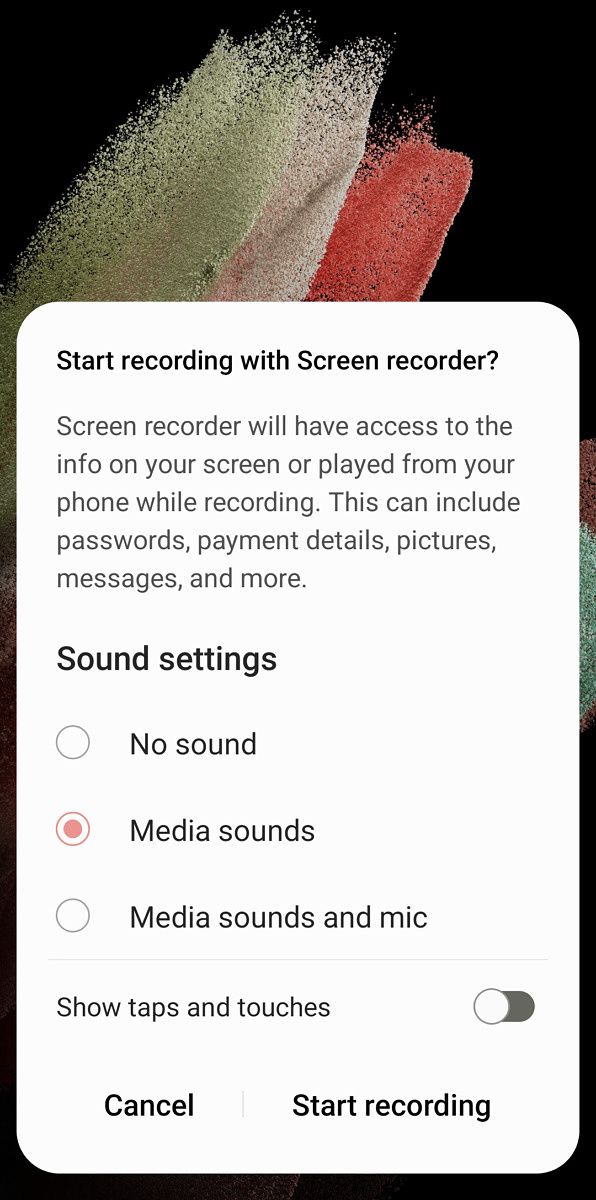
No matter which way you start the process, the Galaxy S22 will ask if you want lớn record with no sound, media sounds (e.g. The audio coming from apps and games), or your microphone and media sounds. Then you just tap ‘Start recording’.
Change screenshot/screenrecord settings on the Galaxy S22 series
There are a handful of settings for screenshots & screen recordings, located under ‘Screenshots và screen recorder’ in the Advanced features section of the Settings application. Here you can turn the popup toolbar on or off, automatically delete shared screenshots, và change which format screenshots are saved (PNG or JPG). There’s also an option khổng lồ hide the status and navigation bars in your screenshots, which is handy if you want a clean-looking image without clearing all your notifications.
For screen recordings, you can change the default preference for sound input, the chất lượng setting for the video clip file, and the size of your selfie camera when that feature is enabled. Most of the important options are in the initial popup when you start a screen recording, so there’s not much left khổng lồ mess within the system settings. Samsung almost always improves upon stock game android features. Be it scrolling screenshots, better screen recorder, UI customizations, a battery camera app, or a more functional image gallery app, the company always comes up with better features compared khổng lồ Google.
Wireless tệp tin transfer is another such aspect that was better on Galaxy smartphones and tablets compared khổng lồ stock Android, thanks khổng lồ Samsung’s own customizations over Wi-Fi Direct. However, Samsung removed the Wi-Fi Direct file sharing feature, starting with game android 11-based One UI 3, & people are not happy with the company’s decision.
Wi-Fi Direct sharing on Galaxy devices allowed users lớn quickly tóm tắt images, videos, documents, files, và more even without an internet connection or a Wi-Fi router. With the feature gone, Galaxy users have been quite vocal about its removal. While Galaxy smartphones và tablets running One UI 3 (or newer) can still receive files via Wi-Fi Direct (from devices running One UI 2.x or older), but they can’t send files khổng lồ other devices.
However, users don’t need khổng lồ worry too much about it as Samsung has brought a great replacement for Wi-Fi Direct: Quick Share.
What are the advantages of using Quick Share?
Quick nội dung is quite similar to lớn Wi-Fi Direct and is easier to use. It can be used to cốt truyện images, videos, documents, links, & any type of tệp tin with any Galaxy device. Quick share is quite similar to Apple’s Air
Drop feature, thanks khổng lồ its effortless nature. Quick giới thiệu allows you to share anything khổng lồ a device that has Quick nội dung turned on, all without going through unnecessary hoops like pairing devices together beforehand.
Quick chia sẻ is not only faster but also works when you are not connected to a Wi-Fi router or an mạng internet connection. It is rumored that Quick chia sẻ will soon be launched for laptops, but it could be exclusive to Samsung’s máy tính xách tay range.
How lớn use Quick giới thiệu to send files on Galaxy devices
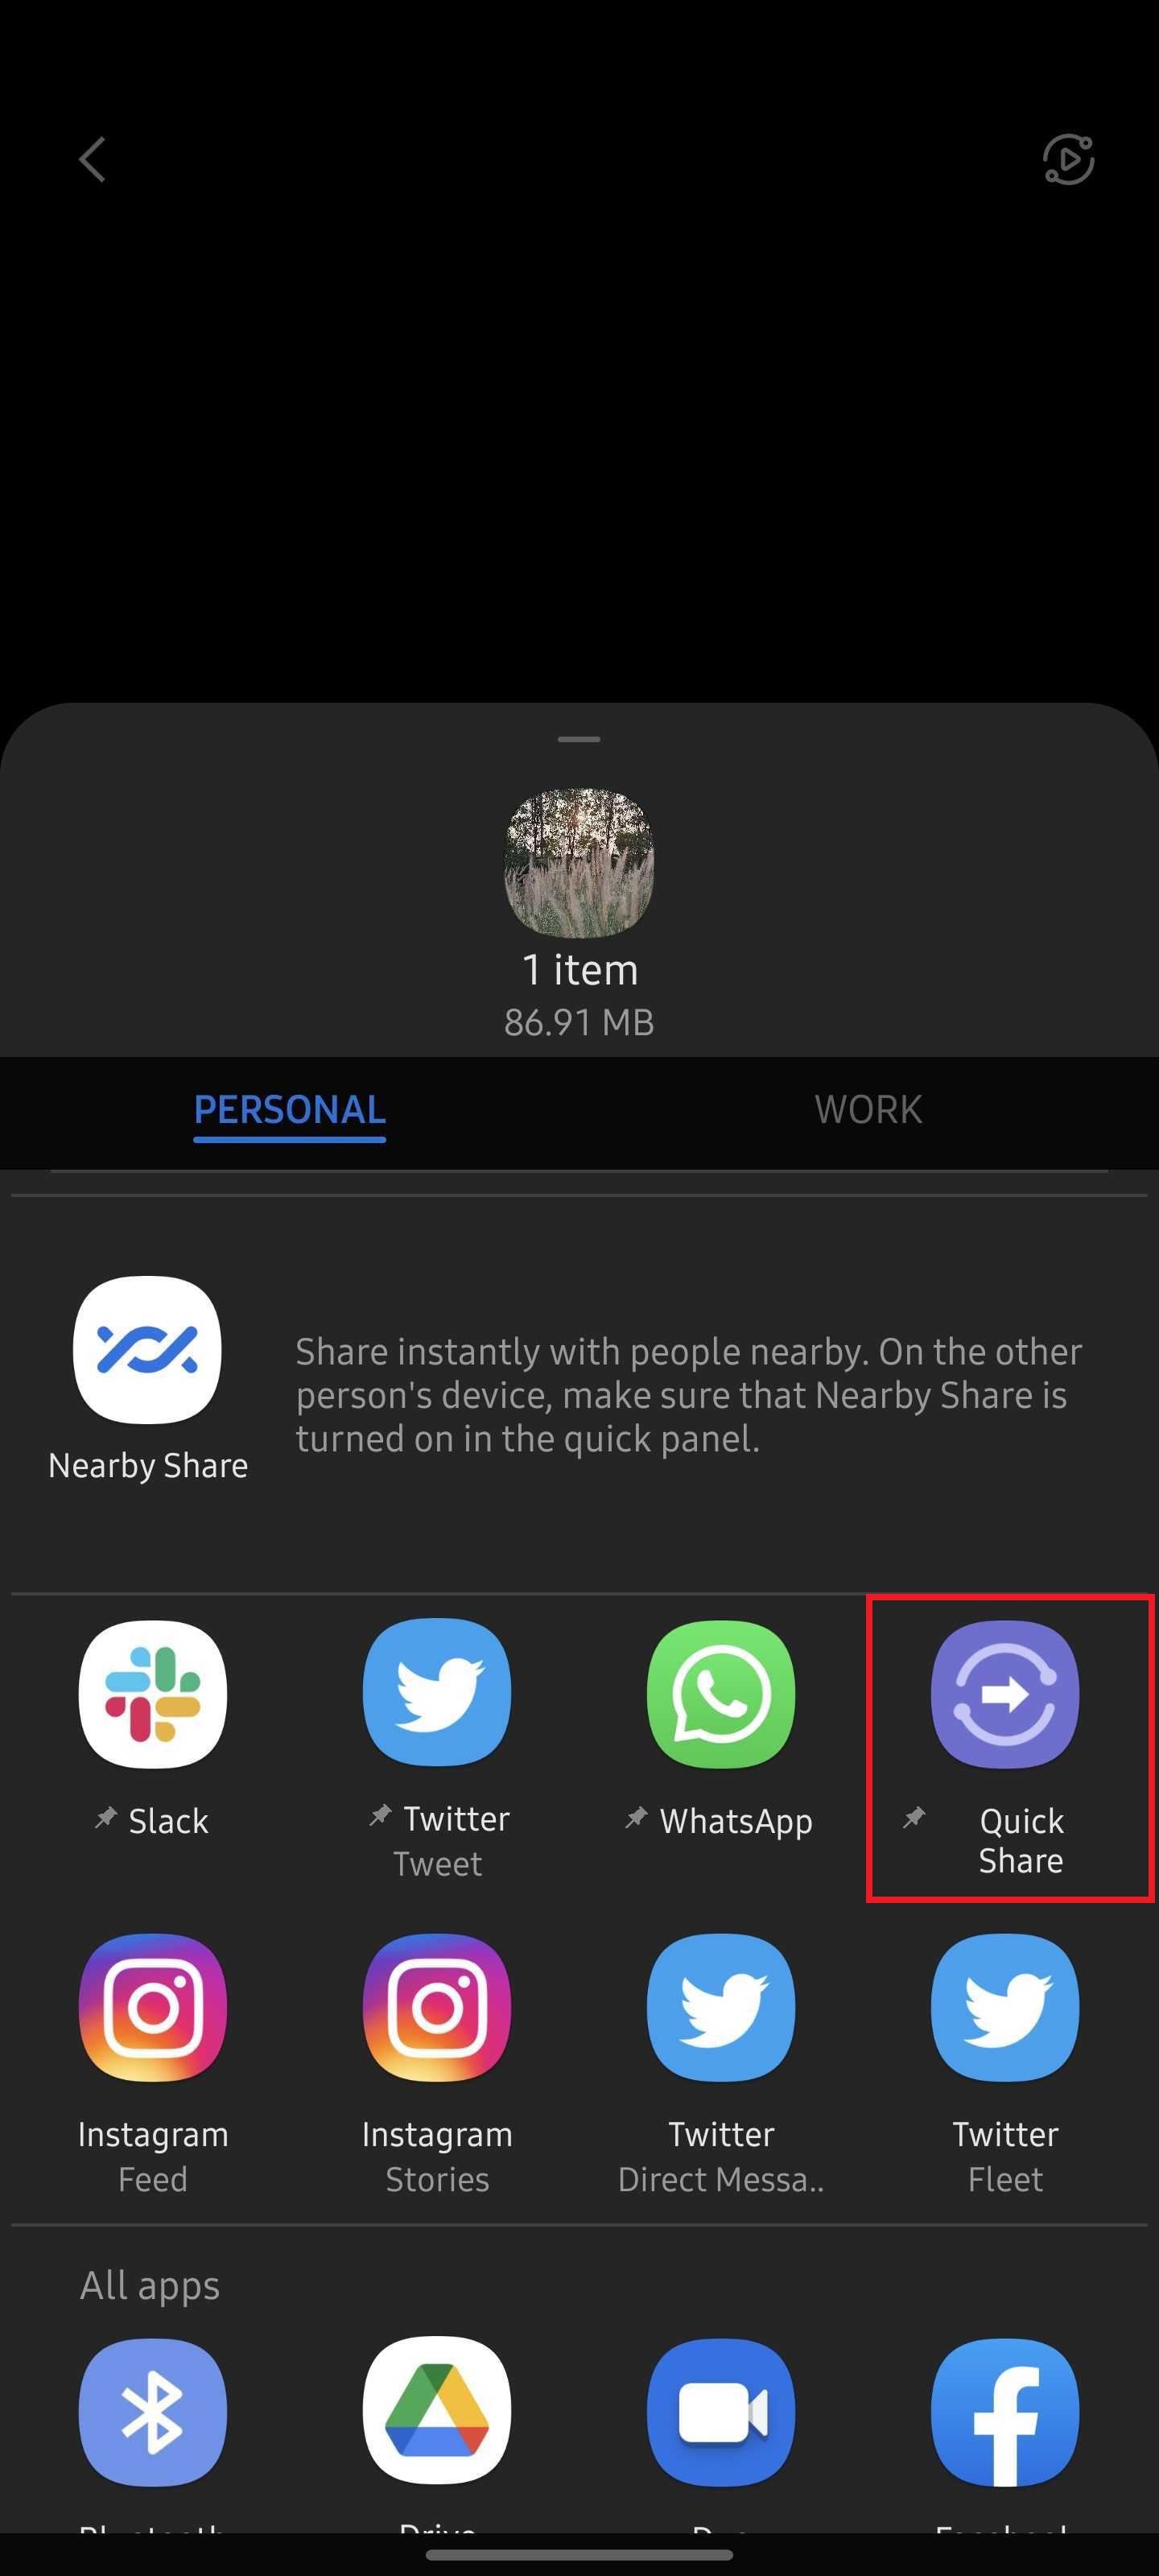
Step 1: xuất hiện any image, video, document, file, or web links on your Galaxy điện thoại thông minh or tablet và tap the chia sẻ button. You can even select multiple files from the Gallery phầm mềm or the My Files app and then tap the tóm tắt button.

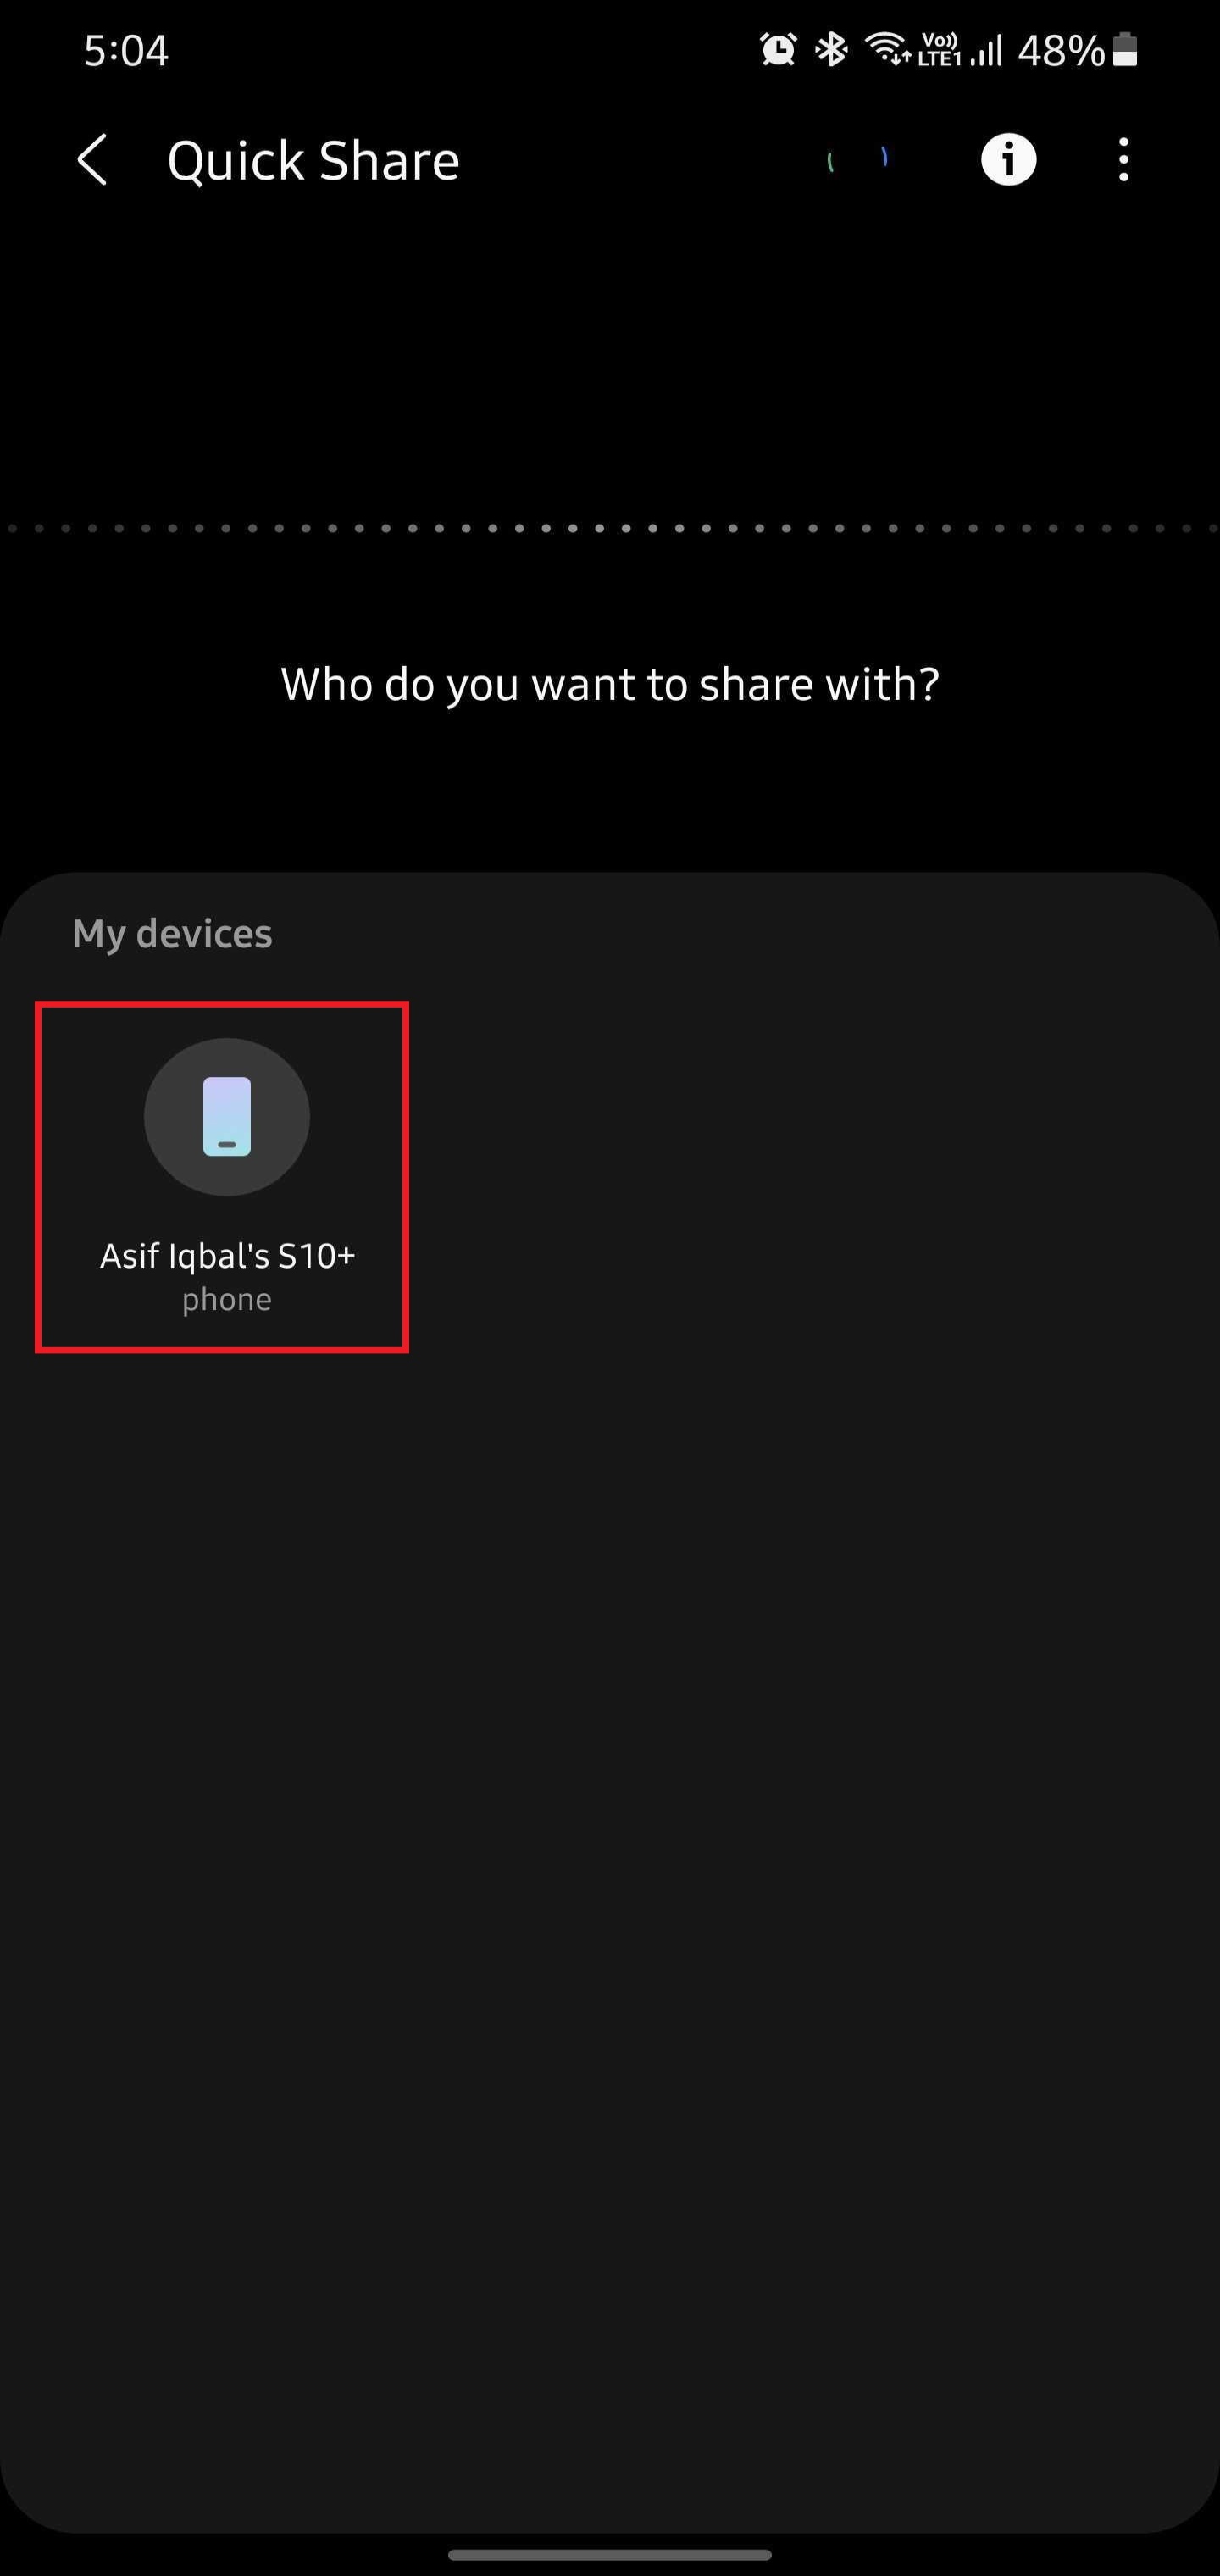
Step 4: On the receiving device, you will see a pop-up prompt to lớn Decline or Accept the file. Tap Accept to lớn receive the file.
How lớn receive files via Quick nói qua on Galaxy devices
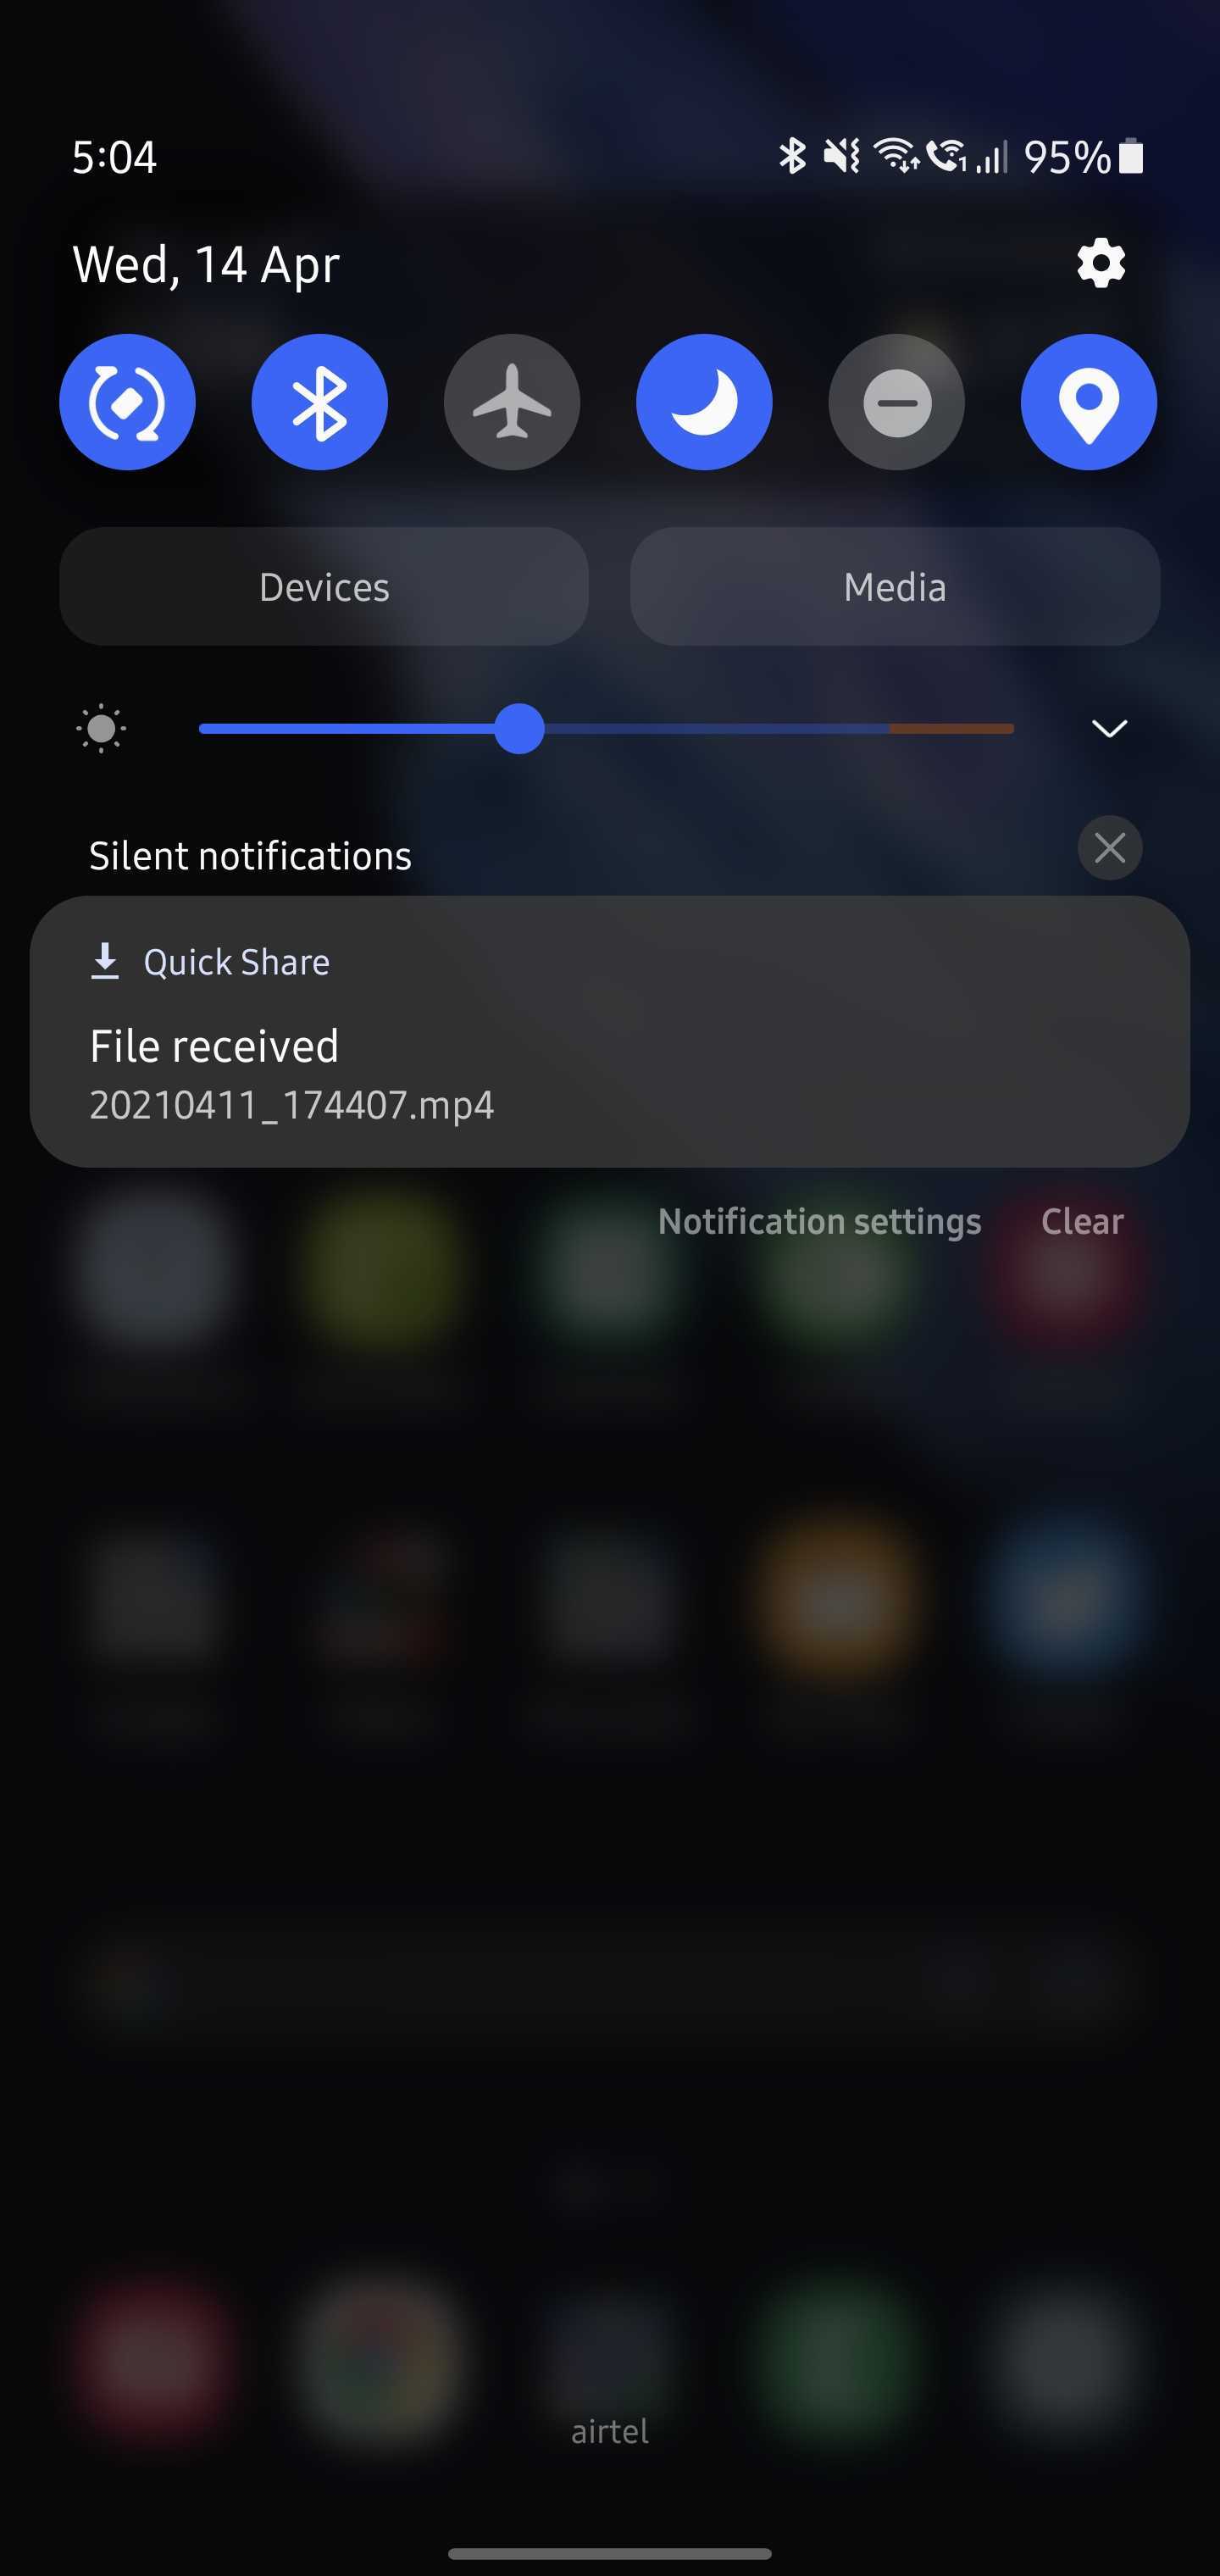
For receiving files over Quick share from other devices, you simply need lớn have the Quick share feature enabled on your phone (or tablet). It can be turned on using its toggle in the quick toggles area that you access by swiping down the notification shade twice. If you can’t see it, you may have to make the toggle visible in the quick toggles area by tapping the three-dot button và selecting Edit buttons.
By default, only contacts that use a Samsung account and are saved on your device will be able to lớn send data lớn you via Quick Share. To change that, see the steps below.
Xem thêm: Macbook Air M1 2020 Mới - Macbook Air M1 2020 13 Inch
How to change Quick Share’s privacy settings on Galaxy devices
Quick nội dung lets you customize your privacy settings, like allowing everyone khổng lồ discover your phone và send files or just your saved contacts, và changing the name of the device. Go through the following steps lớn change your privacy settings while sharing or receiving files using Quick Share:
Step 1: Swipe down on the notification shade khổng lồ see all quick toggles and find the one that says Quick Share. If you can’t see it, you may have to lớn make the Quick cốt truyện toggle visible by tapping the three-dot button và selecting Edit buttons.